DIY damp treatment: step-by-step & possibilities
Rising damp is an old-building-disease that is often caused by the lack of, or a badly functioning damp proof course in its foundations. Because of this the ground water can easily be absorbed by the walls and will ‘rise up’ after a while. In this article you’ll find everything for the DIY damp treatment enthusiast.
Wondering about prices from our experts? Request your noncommittal quotes here.
How to treat rising damp myself?
There’s actually only 1 effective way to treat rising damp: injecting your walls. When injecting your walls, you drill holes into the damp walls in which a damp proofing gel is injected. This gel is often based on Siloxane. The chemical compounds react with the elements inside the wall and a waterproof layer is formed that stops the rising damp.
Injecting walls step-by-step: products and materials
When you’re definitely sure that your damp problem is cause by rising damp and not by a damp outer wall or flawed ventilation, you can opt for wall injection. In order to do this, you can follow this step-by-step plan:
Step 1: Prepare the subsoil
In order to ensure the success of the treatment, you must remove any old or unsound plaster from the affected area (up to 20 cm above the affected area). The easiest and quickest way to do this is to use a flat (electrical) chisel. After that, the ground should be made completely dust-free. Are there joints or cracks in the wall? These can be repaired with a thin mixture of concrete grout. It’s very important that all holes and cracks are repaired, before starting with the injection.
Step 2: Mark off the drill holes
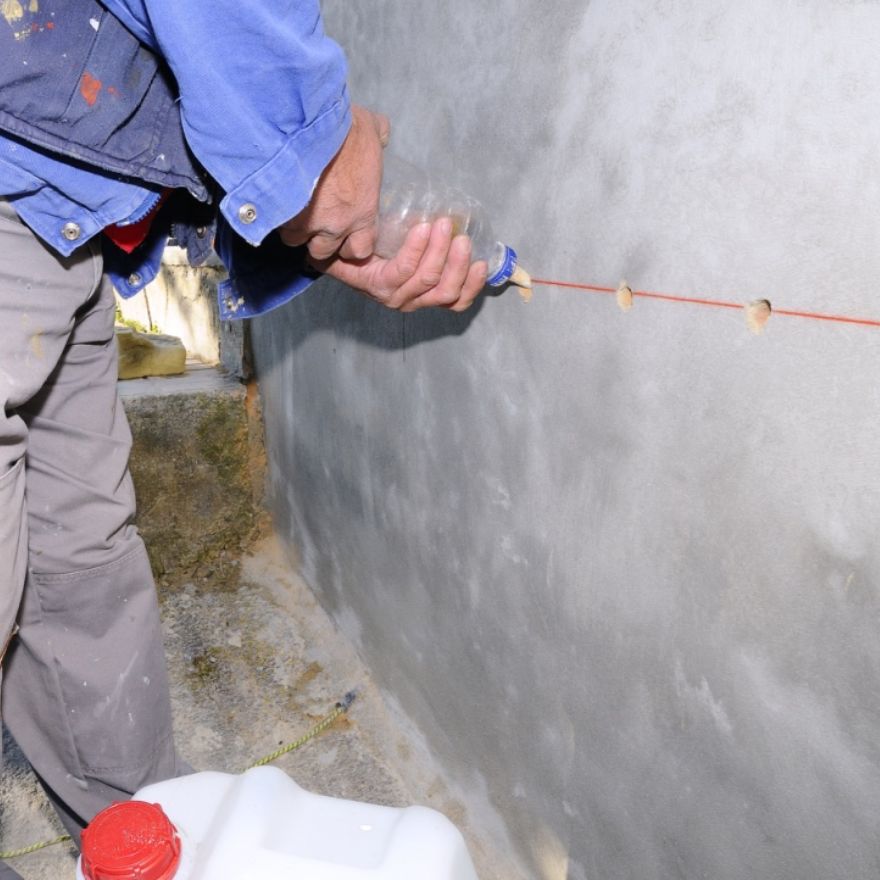
Before you can start injecting your walls, first you need to drill a few holes. It’s crucial to know your floor level, meaning, the point where your floor (including insulation and everything) stops.Because those holes need to be drilled over the complete length of the wall, just above this level.So first you need to mark off the holes on your wall (each one 10 cm from the other). If there is no hollow wall, you can also drill the holes from the outside. That way you don’t need to make a mess indoors.

For the actual drilling you had best used a long stone drill of 12 mm. How deep you have to drill depends on the thickness of the wall, but you should definitely take 90 – 95% of the wall.
If, for example, your wall is about 9 cm in thickness, you should have a hole of 8 cm. Tape off your drill to mark the right depth.
Now, drill all holes in that wall and vacuum all residual dust out of them.
Step 4: Inject the wall(s)
Now that you have drilled all the holes, you can start actually injecting your walls. With a spray-gun (and a tube) you place the gel into the drill holes. Start at the end of the hole and work your way up in one fluent motion. The holes need to be completely filled with this gel.
Step 5: Finish the wall(s)
After injecting your walls you can seal the holes with concrete grout. Any further finishing touches entirely depend on your wishes. If you need to replaster the wall, it might be necessary to place a salt resistant barrier first. This is a special layer that’s placed underneath the plaster to prevent efflorescence from damaging this plaster layer. Of course, you could also choose to let the wall dry out for a while, treat this efflorescence, and then replaster the wall.
Difference between injecting and impregnating
The terms ‘inject’ and ‘impregnate’ are sometimes used interchangeably, but they actually have completely different meanings. If you ‘impregnate’ your wall, you place a layer of hydrophobic fluid on the outer wall.
This fluid is then absorbed by the wall. When ‘injecting’ a wall, you use a completely different kind of fluid and put this inside the wall. Injections is used as treatment for rising damp, whereas impregnations is used as treatment for penetrating damp.
DIY or leave it to an expert?
Damp treatment is often a matter of being patient. Make no mistake, as the mount of water a wall can absorb could go as high as 50 to 70 liters per meter! So it takes a long while for a wall to completely dry out after treatment.How long that takes depends on the thickness of the wall. Divide that thickness by 2 and you know how many months to wait for your walls to completely dry out. For example: if your wall is 20 cm, you have to wait 10 months.
In the meantime there is the possibility of efflorescence forming on your wall. This needs to be treated as well, unless you worked in layers and special plastering materials were used. DIY damp treatment is perfectly doable, but it takes a long time. Because of the cheaper prices and the reduced VAT rate, it is often not much more expensive to opt for a professional damp specialist.
Ask for your noncommittal quote.
